Point of Sale Serve Screen

This is where you serve Breakfast, Lunch, Supper and Other.

There are (3) three easy steps to serving a student:

  1. Select the student.
  2. Select the items.
  3. Enter the payment.

First, let's take a look at the serve screen.

The Serve Screen is sectioned off into:
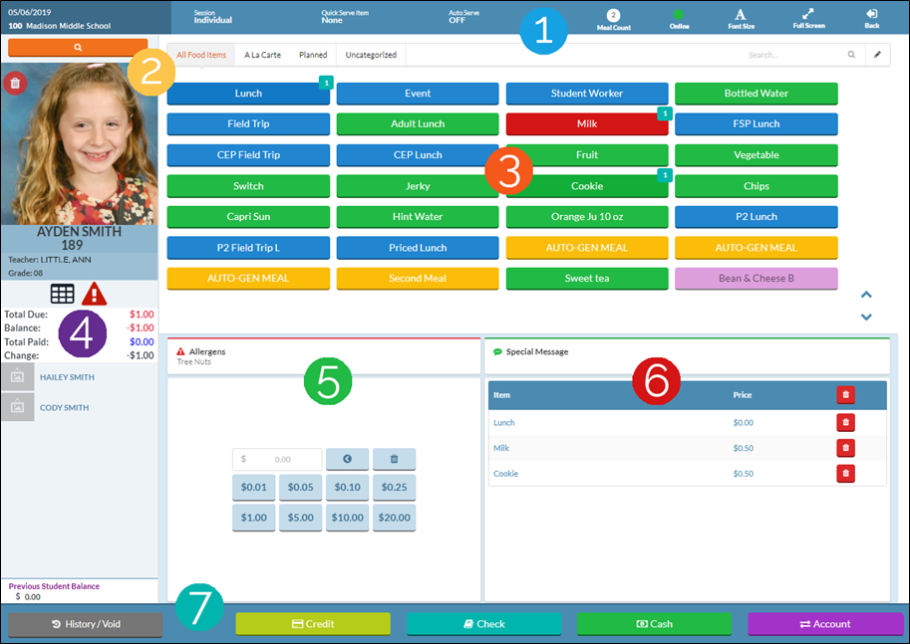
Serve Screen Sections
Serve Screen Header
  • View Date and Site Information
  • Switch between Session Types
  • Change the Quick Serve item
  • Turn Auto Serve on and off
  • Track the day's Meal Count and Online/Offline Mode Status; increase Font or Screen Size; or Go Back to Meals Plus Web homepage
Select a Student

Serve Students by:

  • Card Scanner/Key pad/Biometric device
  • Name
  • Serving Number
  • ID
Served Items Section
  • View all items available to be served

Current Transaction Information and the Queue

  • View Total Due, Balance, Total Paid, any Change
  • Enter any Check numbers for checks received
  • View Students in the Queue

Allergen &

Transaction Sections

  • View any student Allergen information
  • Enter any monies received using pre-set $ Amount buttons

Special Message & Item Selection Sections

  • View any student Special Messages
  • View items selected for purchase

Serve Screen Buttons


  • Cash vs. Account buttons
  • When to use the Check or Credit button
  • Student Transaction History or Void Transactions


©2021 EMS LINQ Inc.

www.mealsplus.com

Meals Plus Web Help, 10/2019